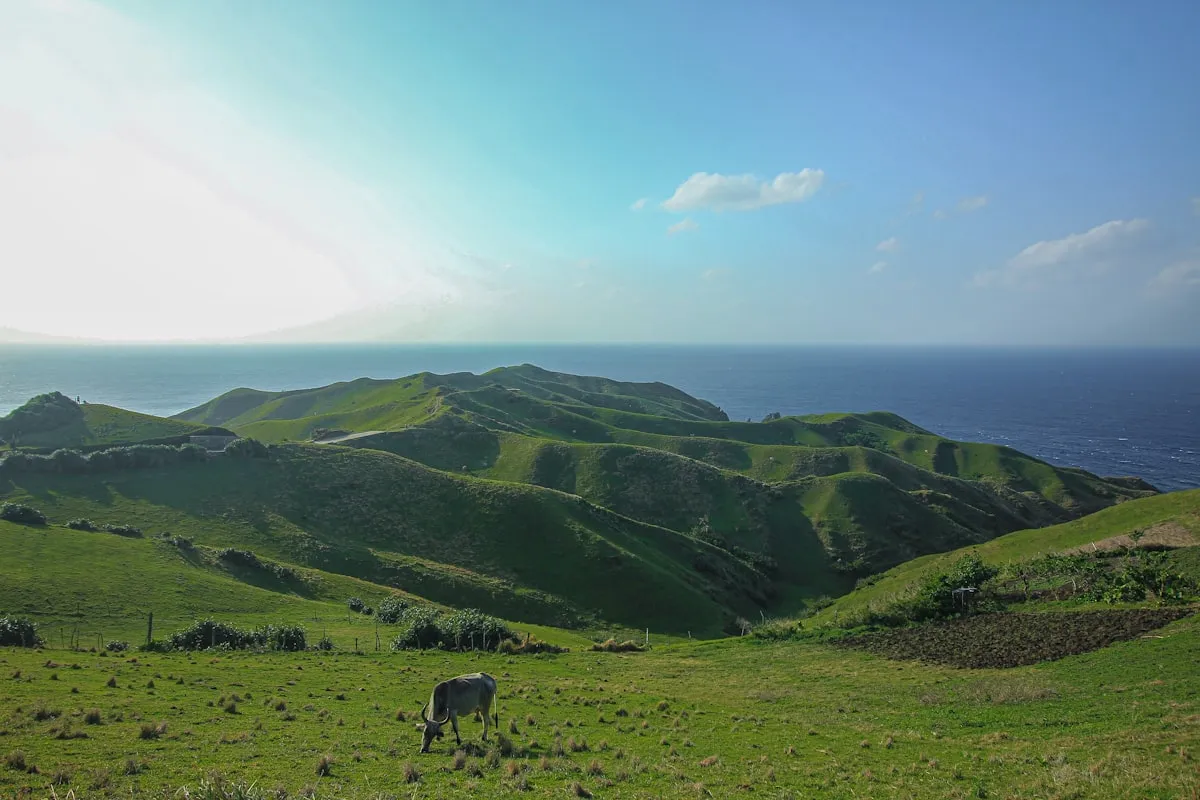
Most people arrive in the Philippines for the beaches. The smartest ones eventually look up from the shoreline and notice the mountains. More than 300 named peaks rise across the archipelago, from easily hiked 800-metre hills two hours outside Manila to the 2,954-metre summit of Mount Apo, the Philippines' highest point, which demands three days, a licensed guide, and a permit. In between is a full spectrum of trekking experiences unlike anywhere else in Southeast Asia -- through rice terraces, volcanic craters, mossy cloudforests, and jungle canyons.
Philippines Hiking & Trekking Guide: Best Mountains and Trails for All Levels
Trip.com
Search on Trip.comHotels in Philippines
Compare live prices via Travelpayouts — targeted for this guide.
This guide covers the full range by difficulty level, with honest pricing, access logistics, and the key rules that apply across all of Philippine mountaineering.
Before You Go: Key Rules That Apply Everywhere
A few principles govern hiking across the Philippines that are worth understanding upfront:
- Guides are required in most national parks. This is both a law and a practical necessity. Trails are poorly marked (or unmarked), terrain changes rapidly, and local guides know weather patterns, water sources, and emergency exits that no app or map captures. PAMB (Protected Area Management Board) accredits guides at most major peaks. Budget PHP 500-1,500 per day for a guide depending on the mountain.
- No solo summit attempts. This is not suggested -- it is a condition of entry at regulated peaks and a fundamental safety rule at all others. The Philippine bush is genuinely unforgiving: dense vegetation, unreliable weather above 2,000 metres, limited rescue infrastructure.
- Bring cash for fees. Municipal tourism offices, PAMB permit desks, and local guide associations almost never accept cards. Permit and guide fees for a single mountain can easily reach PHP 2,000-5,000 per person. Withdraw cash before you leave the city.
- Leave No Trace. Philippine mountains suffer from litter from poorly managed group treks. Pack out everything. Carry your own reusable water container and use water sources where your guide advises rather than buying plastic-bottled water.
- Register your itinerary. The local tourism office or PAMB desk requires registration before you start. This is also your safety net -- if you do not return by your logged exit time, the rescue process begins.
Beginner Level: First Peaks Near Manila and Beyond
Mount Batulao (Batangas, 811m)
Difficulty: Easy-Moderate | Entrance: PHP 50 + PHP 200 guide | Total time: 4-5 hours round trip
Trip.com
See all tours in Philippines on Trip.comHiking tour in Philippines
Hand-picked experiences in Philippines — book on Trip.com with instant confirmation.
Mount Batulao is the most popular beginner peak in Luzon -- a 45-minute drive from Tagaytay and 1.5 hours from Manila via SLEX. The trail system has two main routes: the old trail (longer, more varied, passes between multiple peaks) and the new trail (shorter, more direct). Both are well-worn and easy to follow with a guide. The summit ridge is open grassland with panoramic views south to the Batangas coast and north toward Taal Volcano.
The mountain is not technically demanding -- no ropes, no serious scrambling -- but the last 200 metres of elevation gain is steep enough to test fitness. Most beginners finish in 4-5 hours including rest time. Day-trip accessible from Manila: depart at 4:30am, summit by 8am, back to the trailhead by noon. Guides are hired at the registration post in Brgy. Bariis, Nasugbu. Water sources are limited -- carry at least 2 litres per person from the trailhead.
Mount Ulap (Benguet, Cordillera, 1,846m)
Difficulty: Moderate | Entrance: PHP 200 + guide PHP 700-1,000 | Total time: 6-8 hours
Mount Ulap in the Cordillera highlands has become one of the most popular trail hikes in northern Luzon because of what it delivers for the effort: cloud sea views over the Cordillera valleys, a trail that passes through mossy forest and open grassland, and enough elevation to feel genuinely high without the multi-day commitment of Apo or Pulag. The summit frequently sits above cloud level in the early morning, giving that sea-of-clouds experience that is one of the visual highlights of Philippine mountain hiking.
The trailhead is in Ampucao, Itogon (Benguet) -- a 30-minute jeepney ride from Baguio City. The trail is well-maintained and the community guide programme in Ampucao is among the most professional in the Cordillera region. An early start (5am from Baguio) gets you to the summit in the morning cloud-sea window before it burns off by mid-morning. Temperature drops significantly above 1,500m -- bring a light jacket even in summer.
Mount Tapyas (Coron, Palawan)
Difficulty: Easy | Steps: 722 | Free access | Total time: 45-60 minutes up
Technically not a mountain hike but a staircase trail, Mount Tapyas is nonetheless the most dramatic viewpoint in Coron town and worth including for travellers who want an elevated perspective without any serious trekking experience. 722 concrete steps rise from the town to a cross and a panoramic viewpoint overlooking the Coron coastline, the tin-roofed town, and the islands of the Calamian group spreading south and west. The view at sunset is superb: the intricate coastline, the inter-island channels catching the last light, the silhouetted mountains of mainland Palawan to the east.
The hike takes 40-60 minutes up and 30 minutes down at a normal pace. No guide required. Bring water -- there are none on the route. Best hiked in late afternoon for the sunset view; the final 200 steps are steep enough that the descent in the dark requires care (bring a headlamp for late sunsets).
Intermediate Level: A Step Up
Taal Volcano Island Trek (Tagaytay, Batangas)
Difficulty: Easy-Moderate | Guide required: PHP 700-1,000 | Boat from Talisay: PHP 1,500-2,500 for the boat round trip
Taal is one of the world's most unique geological features -- an active volcano sitting on an island inside a lake, inside a larger volcanic caldera. The trek to the Taal crater from the Talisay landing (45-minute boat crossing from the Tagaytay lakeside) takes about 45 minutes on foot or 20 minutes on horseback. The crater itself is a steaming, sulphurous caldera lake. The whole experience -- boat crossing, crater ridge walk, views into the lake-within-a-lake -- takes 3-4 hours return and is one of the most accessible dramatic volcanic experiences in Southeast Asia.
Important: Taal is an active volcano and the area is subject to alert level restrictions. PHIVOLCS issues regular alert level updates -- never visit when the alert level is 2 or above. At alert level 0-1, the trek is permitted with a registered guide. Check the PHIVOLCS website (phivolcs.dost.gov.ph) the morning of your planned visit. The January 2020 eruption covered the area in ash -- the trail has recovered but the landscape remains visually dramatic and somewhat haunting as a result.
Osmeña Peak (Dalaguete, Cebu, 1,013m)
Difficulty: Easy-Moderate | Entrance: PHP 50 | Guide: Optional but recommended | Total time: 1-2 hours to summit
Osmeña Peak is the highest point in Cebu and the most dramatic viewpoint on the island -- a series of jagged limestone pinnacles rising above rolling green hills with 360-degree coastal views. The trail from the Mantalongon barangay road is short (1-2 hours to the summit depending on fitness) and relatively well-marked, making it the one Philippine peak where experienced hikers sometimes skip the guide requirement. However, the descent options and the surrounding trail network benefit significantly from local knowledge -- a guide from the Mantalongon community (PHP 500-700) is money well spent.
Best combined with a morning sunrise start from Dalaguete (2 hours from Cebu City by bus) and a post-hike stop at the Osmeña Peak camping area, which overlooks the South Cebu coast. The area around Mantalongon market (known for vegetable production in the cool highlands) makes for a good provisions stop.
Mount Mayon Approach Trek (Albay, up to 1,000m permitted level)
Difficulty: Moderate | Guide: Mandatory, PHP 800-1,500/day | PHIVOLCS permit required
Full Mayon summit attempts are only permitted in rare low-alert windows by experienced, accredited teams. But the approach trek to the 1,000-metre level offers an extraordinary experience: you are walking up the slopes of Asia's most perfectly conical active volcano, through alternating lava fields and jungle regeneration zones, with increasingly dramatic views of the Albay lowlands and Albay Gulf below. The terrain above 600 metres becomes genuinely steep volcanic scree. Guides are stationed at the Mayon Resthouse at 800 metres -- a popular overnight camping point even when summit access is restricted.
Check PHIVOLCS alert levels. At Level 0 or 1, the approach trek to the campsite at 800-1,000m is generally permitted with a licensed guide from the Albay provincial tourism office. Alert Level 2 closes all public access immediately. The sunrise view from the resthouse camp over the Albay flatlands, with the volcanic cone rising above you, is one of the most powerful landscape experiences in the Philippines.
Advanced Level: Multi-Day Challenges
Mount Apo (Davao del Sur/North Cotabato, 2,954m)
Difficulty: Strenuous | Duration: 2-3 days | Cost: PHP 4,000-8,000 guided package all-in
The highest peak in the Philippines is a genuine multi-day mountaineering achievement. Three main trails lead to the summit:
Via Kidapawan (Cotabato): The most popular route, typically done in 2 days (Day 1: trailhead to Lake Venado basecamp; Day 2: summit and return to trailhead or camp again). This route passes through old-growth rainforest, a volcanic boulder field, and the crater lake of Lake Venado at 2,650m elevation.
Via Kapatagan (Davao del Sur): The longer route (3 days recommended), more gradual gradient, considered more appropriate for first-time Apo climbers or those concerned about the pace of the Kidapawan route. Passes through cloud forests with orchids and mosses, a dramatic sulfurous plateau, and the summit cross.
Via Sta. Cruz (Cotabato): The most technical and least-used route. Recommended only for experienced mountaineers with prior multi-day trek experience in the Philippines.
All routes require a PAMB permit (PHP 500-1,500 depending on route) plus a licensed guide (PHP 1,500-2,500/day). Porter hire is available (PHP 800-1,500/day) and strongly recommended for first-time climbers carrying camping gear. Comprehensive guided packages from Kidapawan City tour operators covering transport, guide, porters, permits, and meals run PHP 4,000-8,000 per person for the 2-day route. Book at least a week in advance for weekends; 2-4 weeks ahead for holiday and dry-season peak periods (March-May, December-January).
The summit area features sulfurous fumaroles, a steel cross erected by ROTC cadets, and on clear days a view that encompasses Mindanao from coast to coast. The midnight summit push -- leaving camp at 12am-1am for a 5:30-6am sunrise arrival -- is a rite of passage for Filipino mountaineers.
The trail passes through the territory of the Bagobo and Manobo indigenous communities who have considered Mount Apo sacred (as the home of the god Apo Sandawa) for generations. Treat the mountain with corresponding respect.
Mount Pulag (Benguet/Ifugao, 2,922m)
Difficulty: Moderate-Strenuous | Duration: 1-2 days | Entrance: PHP 500 + guide required, PHP 600-800/day
The second highest peak in the Philippines and the highest in Luzon, Mount Pulag is famous for two things: its summit plateau covered in dwarf bamboo grass, and the sea of clouds that fills the surrounding valleys at sunrise when conditions are right. The Ambangeg Trail is the most accessible route: paved road to 2,400m, then a 2-3 hour hike on a well-maintained trail to the summit. Day-hike permits are available but the classic experience is an overnight at Camp 2 (2,700m) with a 3:30am wake-up for the 1-hour summit push to catch sunrise.
DENR requires all hikers to hire a local guide from the Visitor Center in Babadak, Bokod (Benguet). The guide fee is fixed and non-negotiable. Temperatures at the summit regularly drop to 2-5 degrees Celsius before dawn -- gear requirements are serious by Philippine standards: thermals, down or fleece layer, windproof jacket, waterproof hiking boots. Trekking poles are strongly recommended on the descent, which can be slippery on dewy grass. The best months for cloud sea views are November through February.
Technical: Expert-Level Peaks
Mount Kanlaon (Negros Occidental/Oriental, 2,435m)
Difficulty: Technical | Duration: 2-3 days | Strict permit requirements; closed when active
Kanlaon is one of the Philippines' most active volcanoes and the highest peak in the Visayas. It is also one of the most demanding treks in the country -- steep, jungly lower slopes, a dramatic crater with fumarolic activity, and unpredictable volcanic behaviour that has led to emergency closures and evacuation of hikers in recent years. The PHIVOLCS alert level must be 0 for any guided climb to be legally permitted, and even then the DENR and provincial government jointly control access through a strict permit system.
Serious Filipino mountaineers consider Kanlaon a must-do peak precisely because of its volcanic energy and difficulty. The main Canlaon City route and the Guintubdan route offer different approaches to the crater. Do not attempt without AMCI-qualified guides and full volcanic emergency gear. Monitor PHIVOLCS extensively in the weeks before any planned attempt.
Mount Halcon (Oriental Mindoro, 2,586m)
Difficulty: Technical | Duration: 5-7 days | For experienced mountaineers only
Halcon is considered by Filipino mountaineers to be the most technically difficult of the country's major peaks. The trail from Baco trailhead involves river crossings that can become dangerous in rain, dense jungle navigation where the trail virtually disappears, and steep ridge sections requiring rope work. The mountain has a reputation for claiming lives of poorly prepared parties. It is an objective for accomplished mountaineers who have completed Apo, Pulag, and several intermediate peaks. Multi-day food carry, experienced guide team, and full emergency protocols are the minimum requirements.
Civet Coffee and Trail Culture at Mount Apo
One uniquely Philippine mountain experience deserves its own mention: kape alamid (civet coffee) at the Mount Apo foothills. The Bagobo and Manobo communities around the Kidapawan trail sell small batches of wild-gathered civet coffee from civets that forage in the Apo forest. The droppings-fermented beans are hand-washed and roasted in small batches -- the resulting cup is extraordinarily smooth, with none of the bitterness of conventionally processed coffee. Prices run PHP 200-500 per cup, PHP 1,500-3,000 per 100g bag. Buying directly from community sellers rather than commercial resellers ensures the money reaches the families who gather it.
Packing List for Philippine Mountain Hiking
- Footwear: Waterproof hiking boots for anything above Batulao-level. Trails are muddy even in "dry" season above 1,500m. Gaiters are useful for leech-prone trails in Apo and Halcon.
- Layers: Philippine lowlands are hot; above 2,000m at night it is cold enough to require insulation. Pack thermals, a mid-layer fleece, and a windproof shell.
- Water: Carry 2-3 litres minimum and use purification tablets or a filter for natural water sources on trail. Giardia is present in some water sources.
- Headlamp: Essential for pre-dawn summit pushes. Carry spare batteries.
- First aid: Blister plasters, antiseptic, insect repellent (dengue is a lowland risk but still present at trail edges), antihistamine for trail allergies.
- Cash: In small denominations. Guide fees, entrance fees, and transport at trailhead communities are cash-only.
Frequently Asked Questions
Do I need a guide for hiking in the Philippines?
For almost all regulated peaks, yes -- by law and for your safety. The few exceptions are very short, very well-marked trails like Mount Tapyas in Coron or Osmeña Peak in Cebu for experienced hikers. For any national park mountain (Apo, Pulag, Kanlaon, Halcon), a licensed guide is both legally required and practically essential. Trail markers in the Philippines are generally poor or absent. Weather above 2,000 metres changes within minutes. Rescue infrastructure is minimal outside of the main tourist islands. Hire the guide -- it also supports the local communities who depend on trekking tourism income.
What is the best hiking destination in the Philippines for beginners?
Mount Batulao in Batangas is the definitive beginner peak for visitors based in Manila -- accessible by day trip, beautiful views, well-established guide system, and a trail difficulty that builds appropriate confidence without being too easy. For visitors in Cebu, Osmeña Peak is the equivalent: dramatic landscape, short approach, and a trailhead reachable by public bus. Both give first-timers the complete Philippine mountain experience -- the heat on the lower slopes, the cool breeze at the summit, and the panoramic coastal views -- without multi-day logistics.
How much does it cost to climb Mount Apo?
Budget PHP 4,000-8,000 per person for a guided 2-day Kidapawan route package covering permits, PAMB fees, guide, porter (for one bag), and basic meals at camp. This is the all-in price from Kidapawan City departure. Individual components: PAMB permit PHP 500-1,500, guide PHP 1,500-2,500/day (2 days = PHP 3,000-5,000), porter PHP 800-1,500/day, campsite fees PHP 100-200. If you self-arrange from Kidapawan, the components add up to roughly the same total as a package -- the package is easier and ensures you get experienced guides who know the route well.
Is Mount Pulag cloud sea guaranteed?
No. The sea of clouds at Mount Pulag forms when warm, moist air from the lowlands rises and condenses below the summit level -- typically happening most reliably from November through February during cold, dry nights. Clear skies on the summit with a full cloud sea below occur maybe 50-60% of nights during peak season. Rain, heavy cloud cover, or strong winds all prevent the effect. If you arrive at Camp 2 for an overnight and wake to find thick cloud at summit level (no clear sky above), the conditions for a sea of clouds below are absent. The mountain is beautiful even without the cloud sea -- but manage expectations and try to plan for at least 2 nights to increase your odds.
What is the best time of year for mountain hiking in the Philippines?
The dry season, November through May, is broadly the best period for most mountains. Trails are less muddy, river crossings are lower and safer, and summit views are more likely to be clear. Within the dry season, March through May is the hottest on lower trails but offers the most stable summit weather. November through February has cooler trail temperatures and the best cloud-sea conditions at Pulag and Ulap. Some peaks (Kanlaon, Halcon) are actually safest in January-February when volcanic and river activity is at its annual low. Avoid major mountain hikes during typhoon season (August-October) unless you are targeting specific eastern-facing or southern peaks (Apo, Davao region) that sit outside the main typhoon belt.

PANA.PH Editorial Team
Philippines travel desk
The PANA.PH travel desk researches, books and re-checks Philippines travel logistics — fares, ferry schedules, government fees and permit rules — and publishes what it can verify.
🏡 Real local stays (book direct)
Hand-picked homestays and guesthouses — book direct, no markup.
Browse all local stays →
🌊 Popular activities (book instantly)
Island hopping, canyoneering, whale sharks — real Klook/GetYourGuide options.
View all activities →